 |
|
Initialize MySQL
|
|
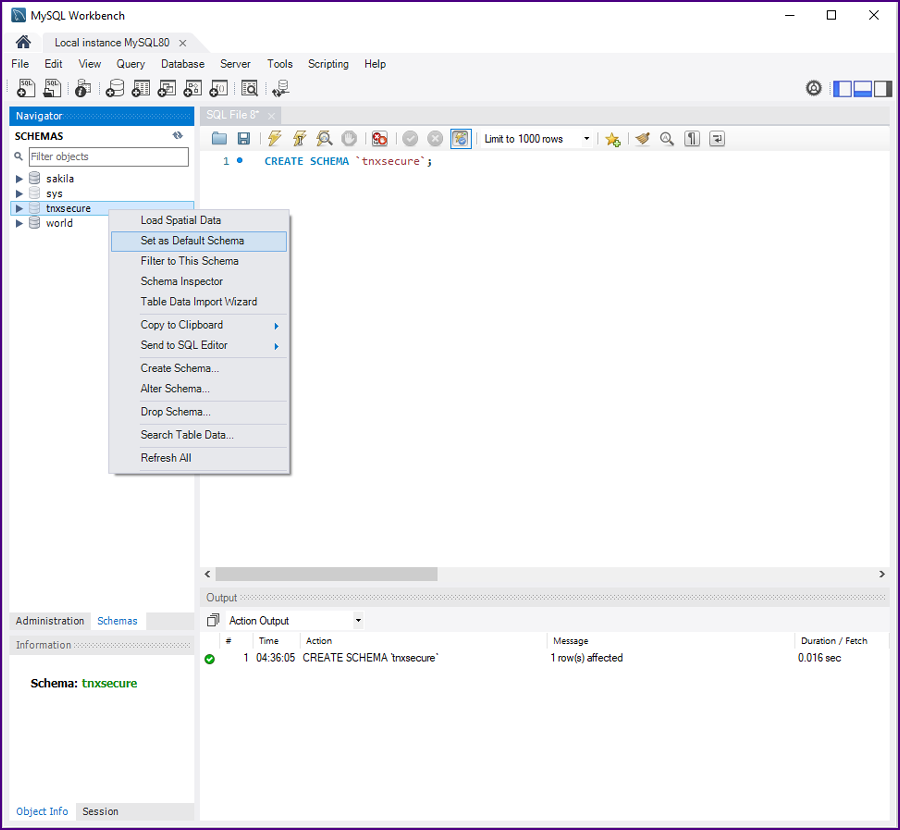
In the MySQL Workbench query window run "CREATE SCHEMA `tnxsecure`;"
|
|
Click the "Schemas" tab in the MySQL Workbench Navigator (next to the "Administration" tab). Then click the refresh icon (two grey arrows).
|
|
You might have to switch tabs from "Administration" to "Schemas" and then click on the refresh arrows in the header (to the right of the "SCHEMAS" label).
|
|
The "tnxsecure" schema should show up in the list. Right click and "Set as Default Schema".
|
|
|
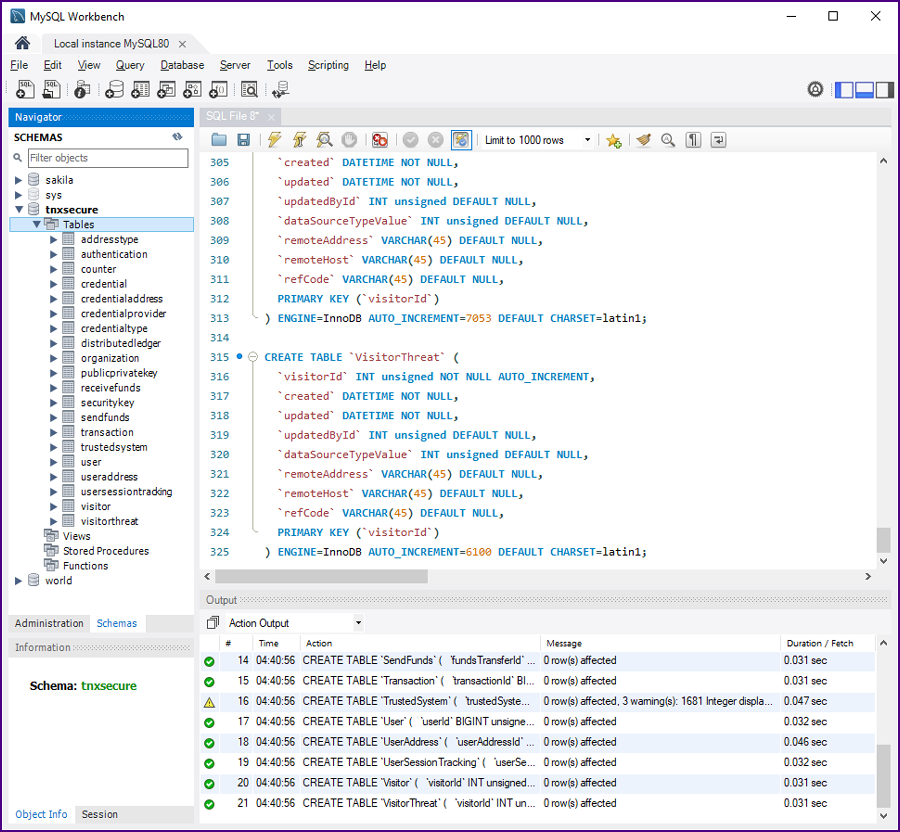
In Eclipse open the file "src/main/resources/foundation.sql"
|
|
Copy and paste all the "CREATE TABLE" statements from the Eclipse file "src/main/resources/foundation.sql" into the
query window in the MySQL Workbench. Execute the statements then right click on "Tables" under "tnxsecure" and select "Refresh All".
All the tables should be displayed.
|
|
|
|
Run the Four Initialization Programs from Eclipse
|
|
First, set the value for the root password for MySQL (the value you choose when you setup MySQL) in your Java code:.
|
|
In Eclipse open the file "src/main/java/io/trustnexus/util/Constants.java".
Set the root password for MySQL as the value for the constant "SYSTEM_INIT_DATABASE_PASSWORD".
|
|
Also, in Eclipse open the file "src/main/resources/config.properties". Set the root password for MySQL as the value for the "DATA_BASE_PASSWORD".
|
|
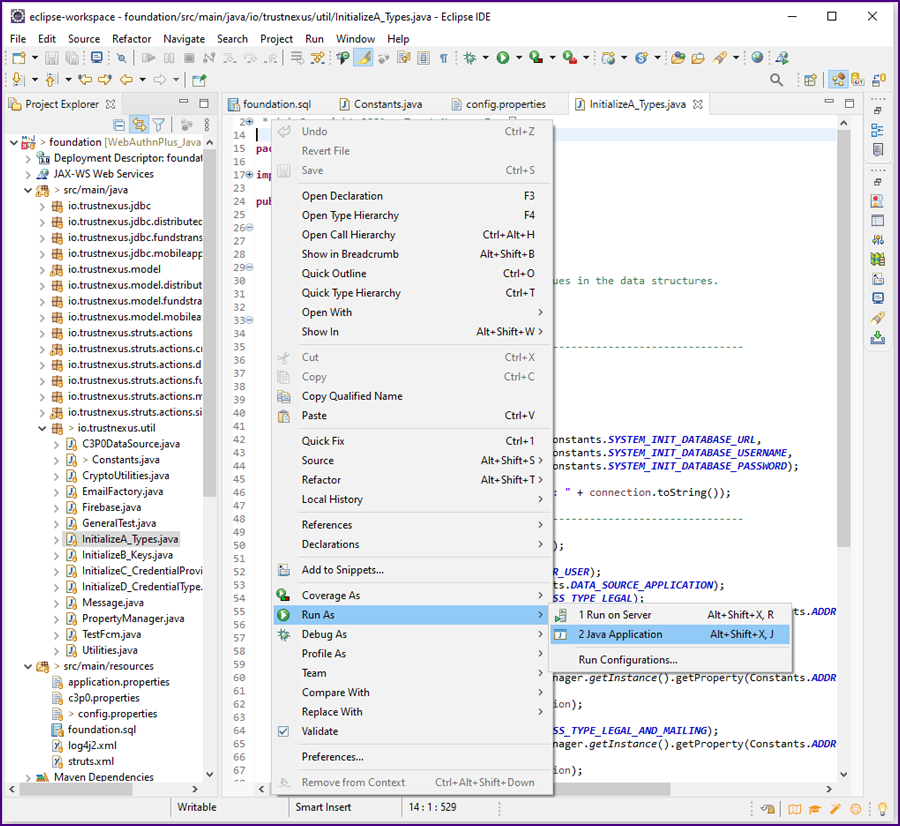
Next, in Eclipse open the file "src/main/java/io/trustnexus/util/InitializeA_Types.java"
|
|
Save. Right click and select "Run As >> Java Application".
|
|
|
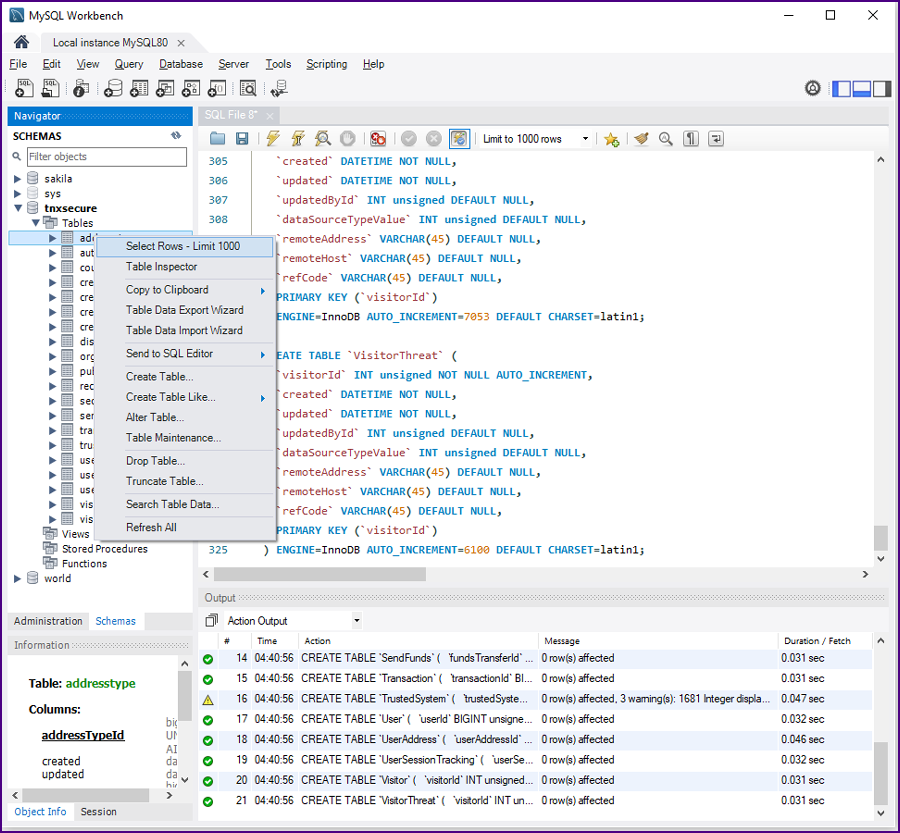
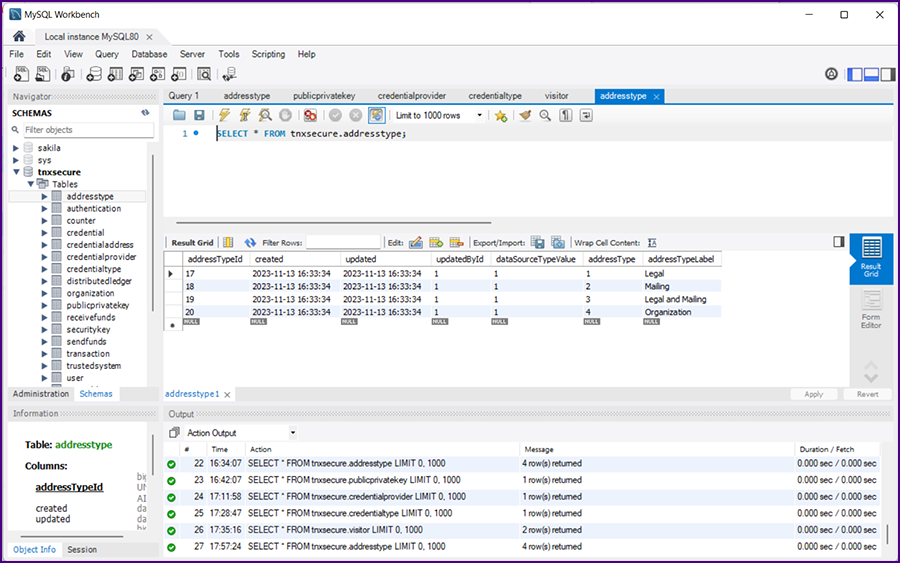
After the program runs,go to the MySQL Workbench, right click on the table "addresstype" and select "Select Rows - Limit 1000".
|
|
|
The query will run and the results will be displayed.
|
|
|
|
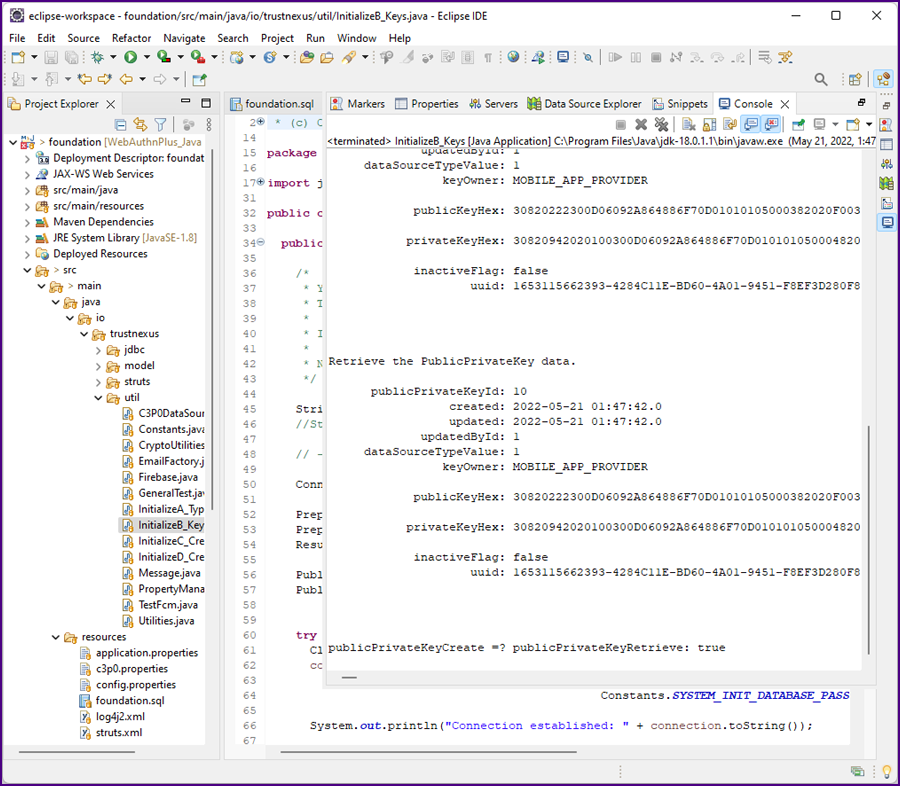
In Eclipse open the file "src/main/java/io/trustnexus/util/InitializeB_Keys"
|
|
Save. Right click and select "Run As >> Java Application".
|
|
The program will generate and test the application's public/private key pair.
If you have not done cryptographic programming before, this brief program will provide a good introduction.
|
|
|
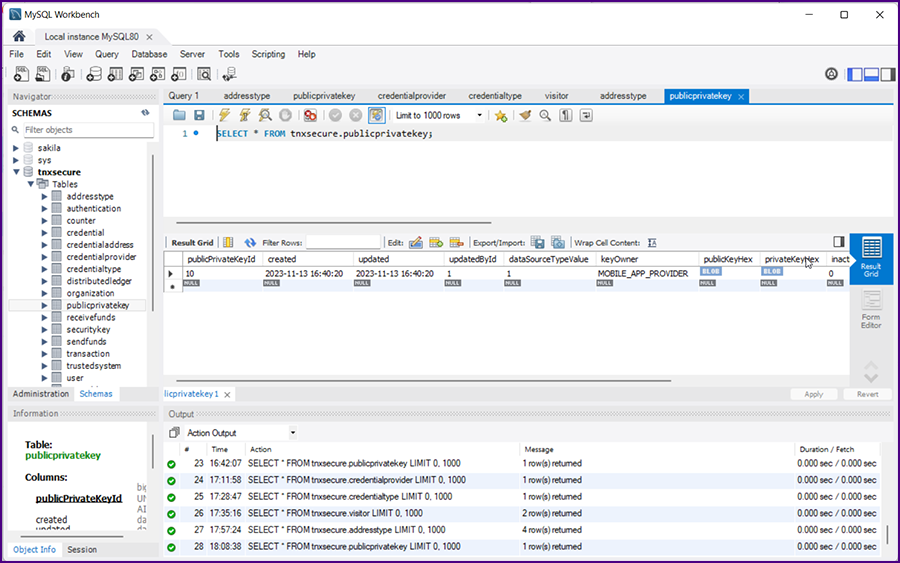
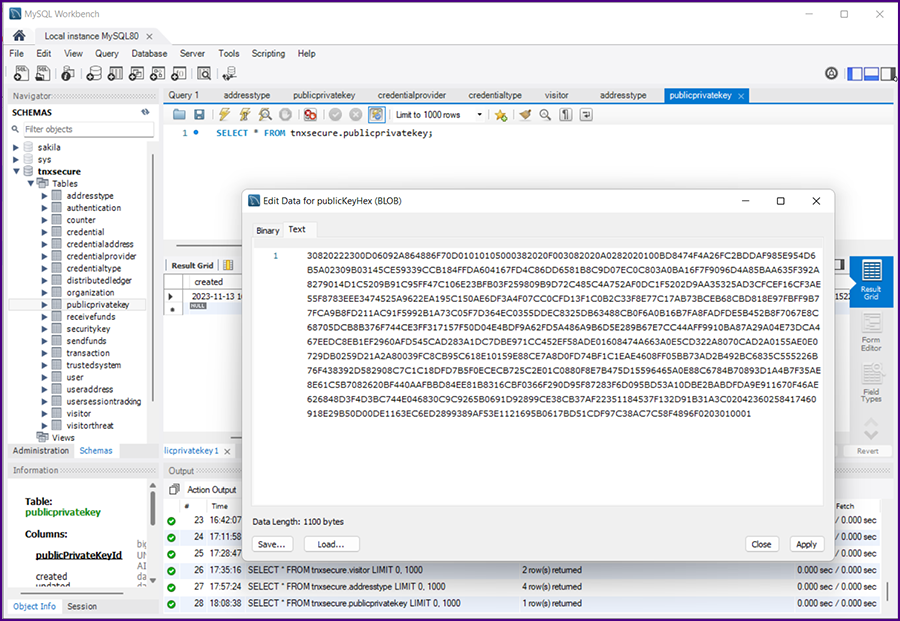
After the program runs,go to the MySQL Workbench, right click on the table "publicprivatekey" and select "Select Rows - Limit 1000".
The query will run and the results will be displayed.
|
|
|
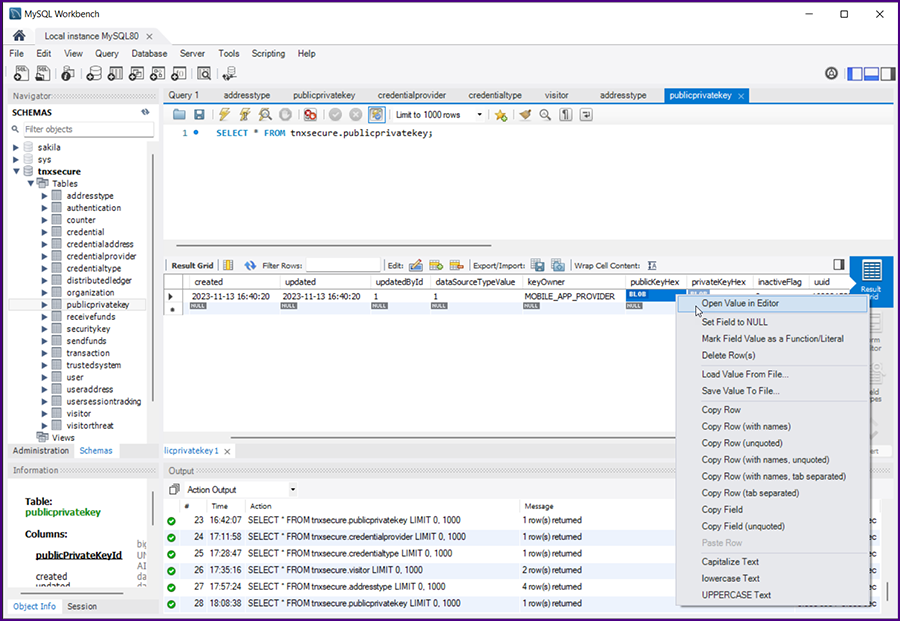
Right click on one of the "BLOB" values and select "Open Value in Editor".
|
|
|
The HEX value of the key will be displayed in the editor. Scroll down. This will give you an idea of the length and strength of the keys.
|
|
|
|
In Eclipse open the file "src/main/java/io/trustnexus/util/InitializeC_CredentialProvider"
|
|
Set your own values for the baseUrl (e.g., "www.webauthnplus.com"), the credential provider name and for the administrator.
|
|
If you do not have your own domain name, go to Dynu;
the cost for a ".com" domain name registration is just $10.99 per year (reasonable) AND they have a free
dynamic DNS service which allows you to host your domain on your home server (incredible)! (DYN from Oracle is $60.00 per year!)
|
|
Save. Right click and select "Run As >> Java Application".
|
|
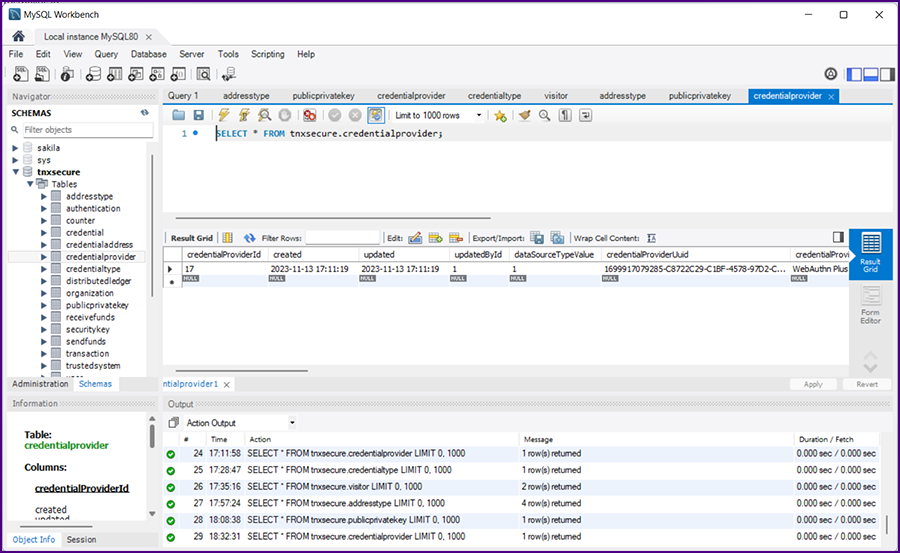
After the program runs,go to the MySQL Workbench, right click on the table "credentialprovider" and select "Select Rows - Limit 1000".
The query will run and the results will be displayed.
|
|
|
|
In Eclipse open the file "src/main/java/io/trustnexus/util/InitializeD_CredentialType"
|
|
Set the publicPrivateKeyUuid from the database (this value was generated by running InitializeB_Keys). Make sure you do not copy in single quotes " '[value]' ".
|
|
Set the credentialProviderUuid from the database (this value was generated by running InitializeC_CredentialProvider). Make sure you do not copy in single quotes " '[value]' ".
|
|
Set the values for credentialType, credentialIconUrl and displayName.
|
|
Save. .Right click and select "Run As >> Java Application".
|
|
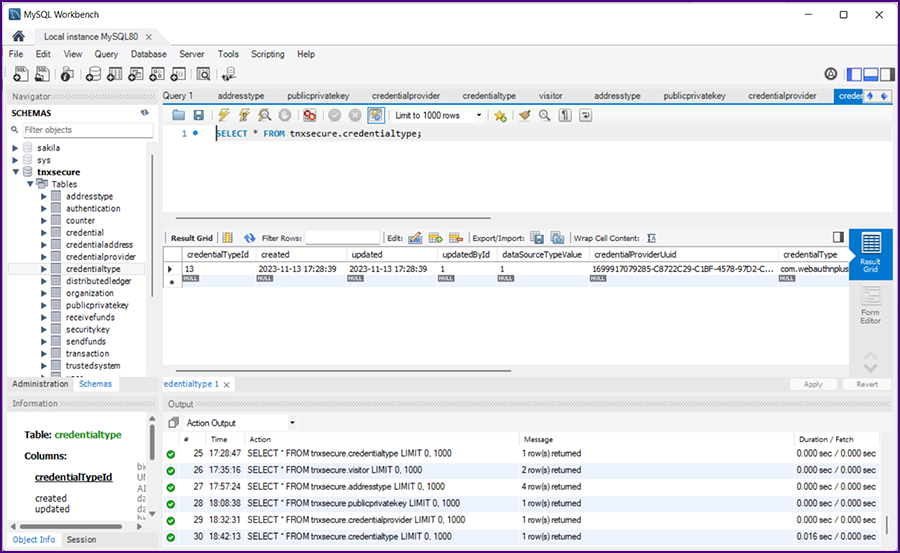
After the program runs,go to the MySQL Workbench, right click on the table "credentialtype" and select "Select Rows - Limit 1000".
The query will run and the results will be displayed.
|
|
|
|
|
|
|